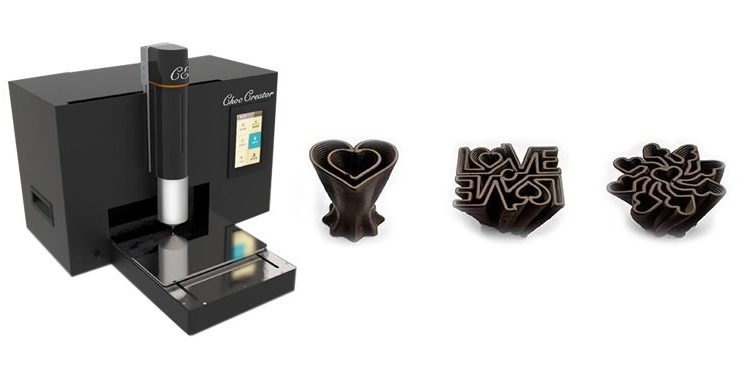
SolveLight Robotics has recently made Choc Edge’s Choc Creator V2.0 Plus Chocalate 3D Printer available for purchase. The mini chocolate factory is an affordable desktop 3D chocolate printer that gives users the ability to print 2D, 2.5D, and 3D chocolate creations. Chocolate 3D printing provides the user with a conventional method of creating unique chocolate designs by simply downloading .STL or .OBJ files from online to be used on the printer or by making your own design via CAD software.
Choc Edge’s Choc Creator V2.0 Plus Utilizes FDM additive manufacturing technology to allow users to create unique and complex designs that were either too time consuming or impossible to be created using traditional means of manufacturing. The 3D printing chocolate process starts with the user sketching a design. After the sketch the user must turn the design into a 3D model using CAD software. Once the sketch has been converted to a 3D model it is saved and then exported into an .OBJ or .STL file. Open the files in Choc Edge’s Chocprint software so that the .OBJ or .STL file can be converted into G-code. Lastly upload the G-code to the printer and start printing.
To start printing you’ll need to load the chocolate into the stainless steel syringe, but before we can do that we need to temper the chocolate. Tempering chocolate involves the heating and cooling of chocolate in order to align the chocolate crystals so that the finished result looks smooth, silky, and glossy; chocolate that isn’t tempered tends to have a dull grayish color and waxy texture due to the cocoa fat separating. The chocolate should have a consistency of something between toothpaste and ketchup. Once the chocolate is tempered the chocolate is drawn into the syringe, make sure to do this step slowly so that there are no air pockets inside the syringe; If you hear any noise when drawing that means air got into the syringe, squeeze out the chocolate and try again. Once the chocolate is in load the chocolate into the printer and start printing.
When printing it’s important to remember not to exceed print times of 65 minutes due to the chocolate dehydrating, once dehydrated the chocolate will not extrude properly. Incase of any failed prints you can always recycle your chocolate, you can add up to 10% of your previous batch to the new batch of chocolate that you’re about to temper, significantly reducing waste. Make sure the chocolate is on a flat surface for maximum adhesion, this will significantly reduce the number of failed prints saving you time and chocolate!
“Working with scientists in the food innovation field field along with 3D printing and industrial design talents, we have created the next generation of our chocolate printer,” notes the Choc Edge team.
3D chocolate printing puts a unique spin on a timeless classic. Create individualized chocolate treats for your family, friends, and coworkers that will leave them smiling! Want to learn more about what the Choc Creator V2.0 Plus can do for you; contact us for more information and pricing.


